
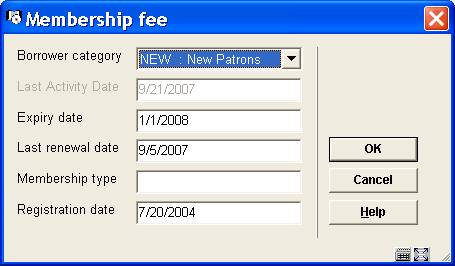
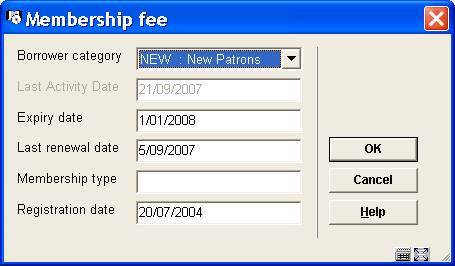
With this option you can specify the date format as presented in the WebOpac or for background processing when the workstation’s date format is not known. You can enter the desired notation for long and short forms of the date. It also controls the format for other dates which are not stored internally such as the date of birth on the borrower record, and it is used for batch or memory processing for reporting such as SSP.
Other dates for display or output in online mode are converted into the date format of your workstation as set in the Control Panel / Regional Settings / Customise / Date tab (see section 651.13.1).
After choosing this option an input form will be displayed:
Long date format: enter the required notation for presentation of the full date.
Short date format: enter the required notation for presentation of the date in short format:
· ‘D’ is used to specify the numeric Day
· ‘M’ is used to specify the Month. f 1 or 2 characters are specified, a numeric month is used. If more than 2 characters are specified, the month is displayed in alpha characters (upper or lower case)
· ‘Y’ is used to specify the Year (2 or 4 digit year)
Next the system will display the result of the chosen notation on the input form in three languages.
General date entry, display and output (i.e. print or email) throughout Vubis Smart is in the format defined by the client’s workstation Operating System instead of using a fixed format of DD/MM/YY. This allows the handling of region specific date formats (i.e. MM/DD/YYYY) and to remain consistent with the workstation and its users.
The setting that determines the date format is different between the Vubis Smart Client environment and the Vubis Smart WebOpac environment.
WebOpac
Since a browser cannot access the settings in the Operating System, the date format to be used in the Vubis Smart WebOpac must be defined in the application. This is done in AFO651 – System date formats.
This AFO is used to set the entry and display date format for the WebOpac.
If it is not defined, the default date format of DD/MM/YY remains in effect.
Client
On each workstation, the Control Panel / Regional and Language options / Customise / Date will determine:
· Short date format (used for dates throughout the system such as due dates, transaction dates, report output dates etc.);
· Long date format (i.e. create/update date for Bibliographic records, $$DATUM for notices).
This means that the date format for output such as notices, invoices or orders to vendors is controlled by settings on the various workstations.
Workstations within an organisation which are used for producing output will have to be checked for proper and consistent set up of date formats.
Impact:
Date display and entry may be different for each region and may be different from the previous fixed setting of Day/Month/Year throughout Vubis Smart.
For example:
Default German uses the format of DD.MM.YYYY (double digit Day and Month with dot separator) with the following results:

Default English, United States uses the format of M/D/YYYY (single digit month and day) producing the following results:
Default setting for English (Australia) or French (Belgium) is in the format D/MM/YYYY (single digit day, double digit month) with the following results:
Example, Due Date field for Overdue Notices
Previously, the date of September 30, 2007 would have produced the following Output
·
Due Date (DD/MM/YYYY): 30/09/07
·
VIDEO J BEAUTY : 39959003542262
·
Title: Beauty and the beast
For US sites whose default regional date setting is M/D/YY, this same notice will produce the following output. Modification on the label (to M/D/YY) is required.
·
Due Date (DD/MM/YYYY): 9/30/07
·
VIDEO J BEAUTY : 39959003542262
·
Title: Beauty and the beast
Exceptions:
· Some reporting structures such as the 47x series of statistics will still request input for dates in a particular structure and will not use the flexible date format.
· AFO481 – Miscellaneous - SIP2 Settings can be used to specify the expected date format for SIP2 devices.
To address the need for more refined restrictions (rather than at AFO level) this option was developed. It allows for User or user group permissions to be defined and controlled at record and field level. Permission settings are defined and verified per database
After choosing this option a submenu will be displayed:

The options are described in the next sections.
Permissions can be defined both for individual users and for user groups. A user group may contain any number of users, and a user can belong to multiple user groups.
A special user * All may be defined with the default permissions. If there are no individual user permissions or user group permissions for a specified user, then these default permissions will be used.
If no permission settings are found, everything will be allowed and access is controlled at the AFO level.
Once a permission bit is defined for one database, then all non-defined databases will be automatically set to the lowest level (read-only). Therefore it is suggested while implementing and setting up your permission profiles a full access profile is set up for All Bibliographic and all Authority databases first. This permission profile should be set to the *All user in order to reduce impact on staff. Continue with defining the desired profiles, using selected users as test subjects. Once all profiles are defined with the desired settings, create user groups or individual user profiles and redefine your default *ALL user for those not explicitly defined with permissions.
Permissions can be set at the following levels:
· Record type and status (add, modify or remove record)
· Record technical data (modification of technical data)
· Holdings information (detailed access to holdings information)
· Order information (detailed access to order information)
· Subscription information (detailed access to subscriptions)
· Individual field (add/modify/remove field, heading creation, visibility of field)
Please note
The permissions for updating "Order" and "Shelfmark" information may become dependant of other permission settings in the future (when similar permissions are implemented for the acquisitions and circulation modules).
The record type for authorities is always *, as no record type distinction exist for authorities.
If your system uses cataloguing permissions, it is possible the message below appears in case you are not permitted to perform certain actions.

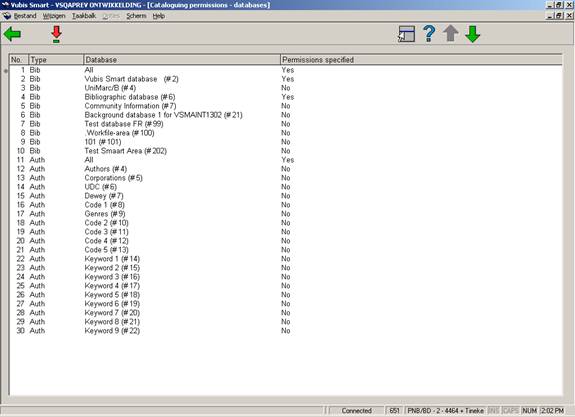
At the database level a select list with databases is shown, with an indication whether permissions have been defined for this database or not.
A special database * is defined (both for authorities and bibliographic databases) that can contain default permissions that are used if no specific permissions are set for a database of that application type.
After choosing this option an overview screen with all databases on the system will be displayed:
Every database can have any number of permission profiles. Every profile has a name, and is linked to a record type and a list of record statuses for which the profile is valid.
The record level permission settings are a property of the profile. They determine if the record of that type may be created, modified or removed, if the technical settings of the record may be modified, and if access to the shelfmark, order and subscription functions is allowed.
Finally, every profile has a list of fields associated, with the permissions for these fields.
When you select a database an overview screen with defined profiles will be displayed:

: use this option to create a new profile. See section 651.14.2.1 for more details.
: select a profile and use this option to modify it. See section 651.14.2.1 for more details.
: select a profile and use this option to delete it. The system prompts for confirmation.
: select a profile and use this option to create a new profile based on the selected profile.
: select a profile and use this option to view/modify the related record permissions. See section 651.14.2.2 for more details.
: select a profile and use this option to view/modify the related field permissions. See section 651.14.2.3 for more details.
When adding or modifying a profile the following input form will be displayed:
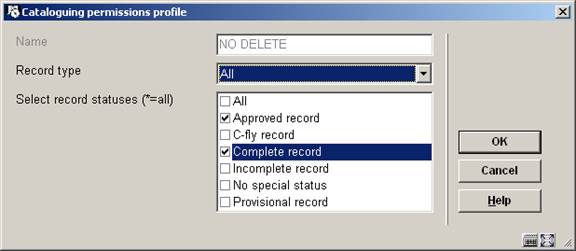
Select a record type and check one or more allowed record statuses.
: select a profile and use this option to view/modify the related record permissions. An input form will be displayed:

Update shelfmarks: if this is NOT checked, the user can NOT access the section Shelfmark(s) on the technical overview screen of a record.
Update orders: if this is NOT checked, the user can NOT access the section Order(s) on the technical overview screen of a record.
Update subscriptions: if this is NOT checked, the user can NOT access the section Subscription(s) on the technical overview screen of a record.
At the field level the add/modify/remove permission can be set for any field, as well as a visibility flag. A field of which the contents are not visible automatically has the add/modify/remove permission field set to "not allowed". For authority controlled fields a permission can be set for the (implicit) creation of new headings. Without this permission only existing headings can be used for the field.
A special field * can be used to set default permissions for non-defined fields.
Note
A permission profile must have fields defined. Failure to define fields in the profile will deem the profile invalid and it will not be active. Each profile should contain at least a definition for * (all fields).
: select a profile and use this option to view/modify the related field permissions. After selecting this option an overview screen will be displayed:

: use this option to create a new permission. An input form will be displayed:

Process field – Does this profile allow the edit and processing of the field? If this checkbox is off, data with this field cannot be modified
Create new main heading - For authority controlled fields, does the profile allow for the automatic creation of new authoriy entries based on the data entered into the bibliographic record.? If this checkbox is off, then only existing authority references may be selected for input. No new authority entries will be created. If this checkbox is ON, then both existing entries may be used as well as new provisional entries be created.
Contents visible - If this option is OFF, the data within the field will be masked with ********.
Note
The check box "create main heading" is not relevant for authority parameters.
: select a permission and use this option to modify it. See the above input form.
: select a permission and use this option to delete it. The system prompts for confirmation.
User groups can be added, modified or removed, and permission profiles can be added to, or removed from, users or user groups. A user or user group can (and probably will) have multiple permission profiles assigned. Permissions are assigned by selecting the user (group). A user can belong to more than one user group.
When a user is defined with multiple permission profiles, the lowest level is applied.
Note
A user listed will also inherit the rights of the default profile (*ALL user). Therefore if the default profile is defined in a restrictive manner, it is suggested to define and assign non-restrictive profiles to individual users. In this case, (specified users) the specified profile is applied.
After choosing this option an overview screen will be displayed:

: use this option to create a new user or group. See section 651.14.3.1 for more details.
: select a user or group and use this option to modify it. See section 651.14.3.1 for more details.
: select a profile and use this option to delete it. The system prompts for confirmation.
: use this option to view the settings for a particular user. See section 651.14.3.2 for more details.
After selecting the option to add a group or a user an input form will be displayed:
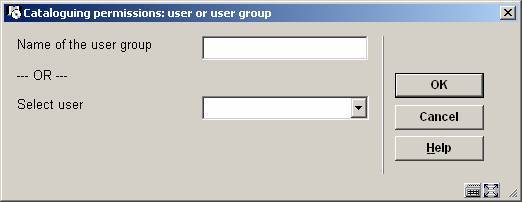
Enter the name of the new group (free text) OR select a user from the dropdown list.
After clicking the next form displayed will depend on the selection of group or user:
User - check the appropriate profile(s):

Group - check the appropriate users that will belong to this group, then check the appropriate profile(s):

After selecting the option to view the settings for a user, a selection form will be displayed:
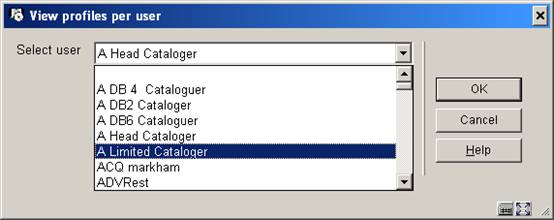
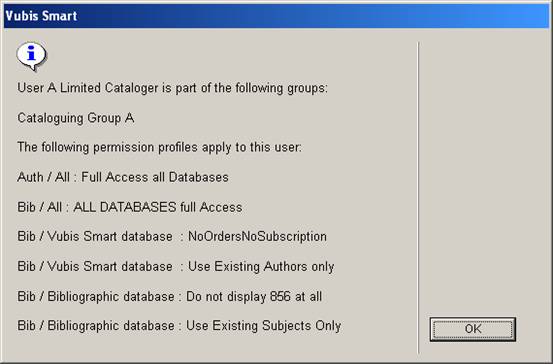
Select a user from the dropdown list (these are the users as defined in AFO 611) and click . The system returns with a list of groups / permissions applicable to this user:
Below is a description of the steps the system takes to verify the permissions in the application, when users try to perform a certain action.
Retrieval of the permission profile
For the verification of the permissions, the permission profile to be used must be selected:
The record type and record status are used to obtain a list of valid permission profiles for that type and status within the database.
The system will check all permission profiles that can be applied for the given user and record type/status, and always take the most restrictive permission. So if for instance two permission profiles can be applied in which a field may be modified according to the first one, but not to the second one, the second profile rule will apply.
The verification of the permissions for the different cataloguing actions is implemented as follows:
· Addition of a new record
The permission is checked based upon the record type
· Modification of an existing record
The permission is checked based upon the record type and record status
· Removal of an existing record
The permission is checked based upon the record type and record status
· Modification of the technical data of an existing record
The permission is checked based upon the record type and record status
· Copy of an existing record
Only allowed if addition of a record of the record type is allowed
· Merge of an existing record
Only allowed if addition, modification and removal of this record type/status is allowed.
· Global delete (from SSP functions)
Record deletion will not be allowed when the user has no permissions for it
Once permission has been given to add or modify a record, the permission checks are done at the field level:
· Addition of a new field
If not allowed, the field will not be shown in the list that is obtained with Ctrl-F5, and if the field is typed in manually, it will be refused upon saving.
· Modification of an existing field
If not allowed, the field will be protected in the record editor. If the field contents should not be visible they are displayed as stars and the field will be protected.
· Removal of an existing field
If not allowed, the field will be protected in the record editor. If the field contents should not be visible they are displayed as stars and the field will be protected.
Addition, modification and removal of relations through the relations group on the record overview screen will be verified based upon record type, record status and the field that is used to store the relation internally.
Authority controlled fields
If an authority controlled field is created or updated, and if the user has no permission for the creation of new headings, then (s)he will only be able to use existing authorities for the bibliographic field. Any attempt to enter a new authority, or change an existing one, will be refused in that case.
· Document control - Change History
|
Version |
Date |
Change description |
Author |
|
1.0 |
unknown |
creation |
|
|
2.0 |
May 2006 |
updates for release 2.4.1 build 16 |
|
|
3.0 |
September 2006 |
updates for release 2.4.1 build 17 |
|
|
4.0 |
December 2006 |
made minor modifications to C-fly chapter |
|
|
5.0 |
March 2007 |
added chapter on cataloguing permissions; updated email info; minor textual corrections; added option system date formats; added authority link search parameter and commercial barcode index parameter |
|
|
6.0 |
November 2007 |
updated info on flexible date formats; added new details feature for cataloging permissions delivered as part of 2.4.2.4 updates |
|